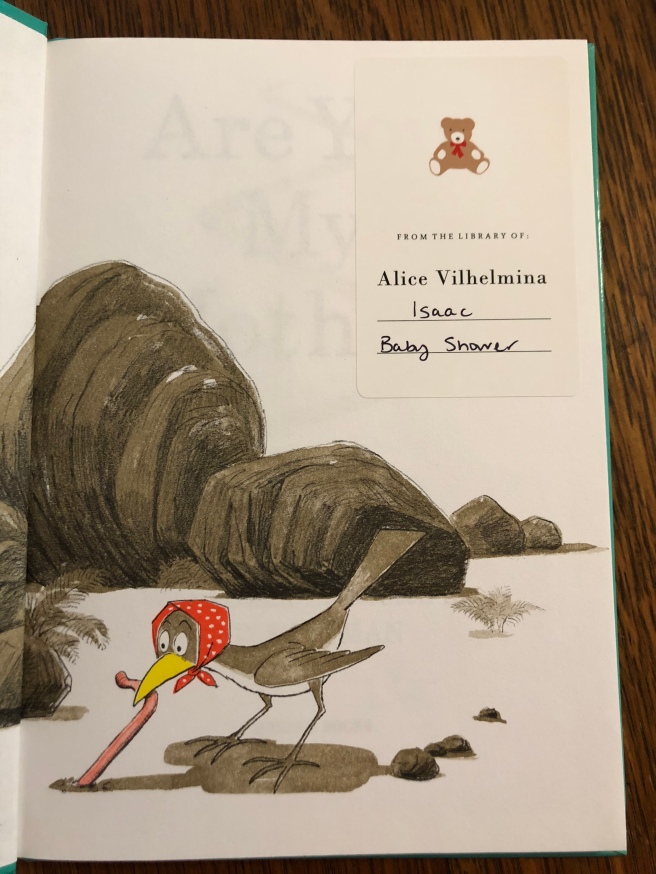
I found the most adorable bookplates on Etsy recently. I had been wanting to write in Alice’s books, who the book was from, and when it was given. So I got these bookplates with her first and middle names, and with two blank lines underneath so I can write the name of the giver and date or occasion given. I love that she (and possibly even her kids) will be able to look at these books years later and know who got it for her.
The shop is called PreppyProdigy and they have so much cute stuff. I especially love the personalized valentines and think it would be so fun to send these to relatives. They also have lots of fun greeting cards.
I decided to make homemade vanilla this year after reading this post by Heather Bullard. We had some extra bottles of vodka anyway because post-baby we don’t really drink much, so I decided to turn them into vanilla for Christmas gifts.
It really could not have been easier so far. I just bought some vanilla beans, cut them into 1/2 inch pieces, and added them to the vodka bottles. Every once in awhile I give the bottles a little shake. That’s it!
In November before the Christmas rush I will filter out the vanilla beans and pour the vanilla extract into individual bottles and label them for gifting. I can’t wait to try my own homemade vanilla!
This would be so cute to do for a card or so. Just use a paper with a heart cutout of it as a guide and do your drawings within it. Or fill it with little stickers.
As a teenager I babysat for two sweet girls. Their family was not rich– we lived outside of a small town in Washington state– but their mother was a master of fun, and those girls always had interesting toys to play with. Every once in awhile we would pull out the bin of Brio wooden train tracks and would spend the better part of the afternoon crafting a track and then rolling the trains over our creation. Sometimes the track would stretch through most of their mobile home. Their collection was undoubtedly amassed throughout their childhood through birthdays and Christmases.
Brio trains provide endless hours of fun for a wide range of ages, are gender-neutral, and can be passed down to the next generation. These are often imitated, but beware cost-cutting measures in imitations, such as plastic connectors, that may shorten the lifespan of the tracks. When buying, look for tracks that are all-wood (especially those sets that are just wood track pieces) and trains that are wood-and-metal.
When I was a kid I went to camp every year on a lake in rural Oregon. We spent our days rowing in canoes, swimming, and jumping off the dock. The camp counselors wore matching faded green polo shirts with the camp logo on them. The bunkhouses were made of cedar and were full of beds with Pendleton wool blankets.
Now we use these blankets when we stay at our one-room cabin in the woods. We have a big one for the bed and a couple of smaller camp blankets that we wrap up in at night when we sit around the campfire eating beef stew that we cooked in the big cast iron pot. Over the years they’ve earned a few holes that we have lovingly stitched up.
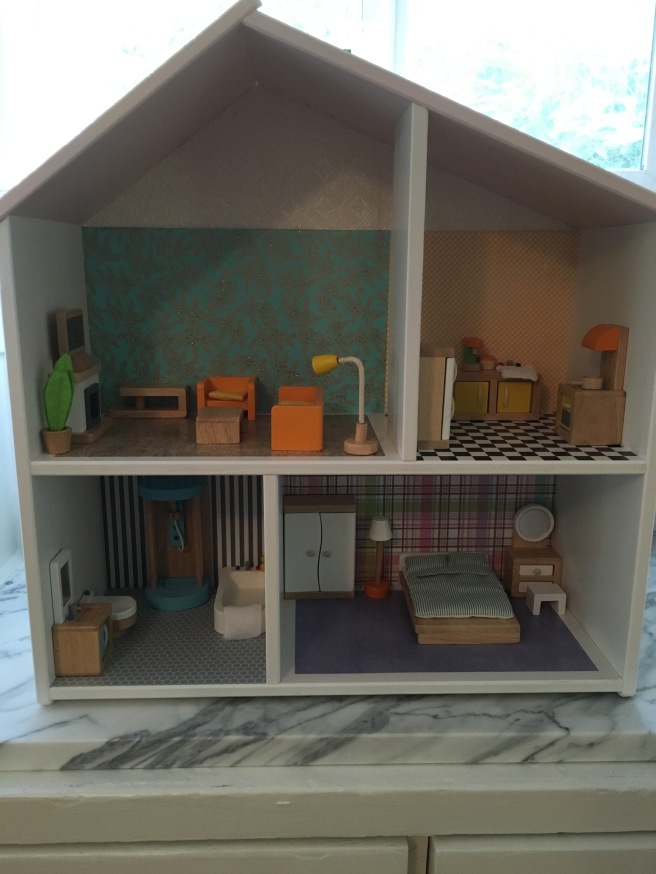
When I saw this dollhouse at IKEA I knew that it would be so much fun to personalize it. I did a lot of looking online at different doll houses people had made to figure out what I liked. I loved this one and got a lot of inspiration from it. I wanted a doll house that my little girl could play with and that would survive some abuse from little hands, so I didn’t want a lot of little pieces.
I liked a clean look with enough patterns to liven things up and make it seem homey. We (my husband) painted everything white, except for the roof which we painted pink (and the chimney, which we left green). All of the paint we used was left over from other interior paint jobs.
The living room.
I used Mod Podge and scrapbook paper to decoupage the floors and walls. I did this before assembling the dollhouse and I think it made it easier. I spent quite a bit of time finding the right scrapbook paper, but I think this is the fun part. Scrapbook paper is much better than wrapping paper for this application since it doesn’t warp from the Mod Podge.
The trick to selecting floors and wallpaper is to choose prints that are the right scale for the dollhouse. If you look at the paper I used in the living room, the floral pattern is just a little too large and doesn’t look quite right, whereas the other patterns are smaller and look right for the space.
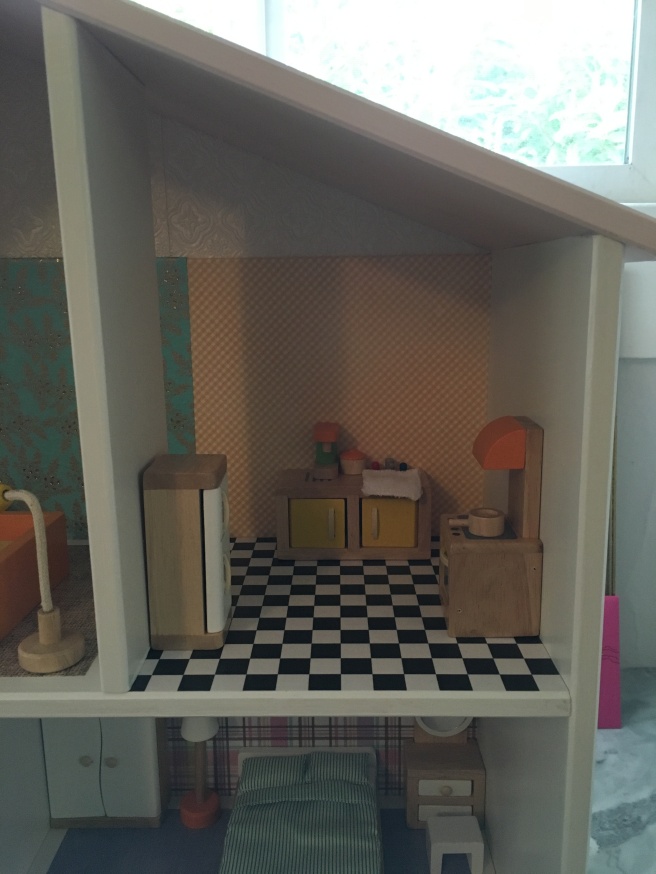
The kitchen.
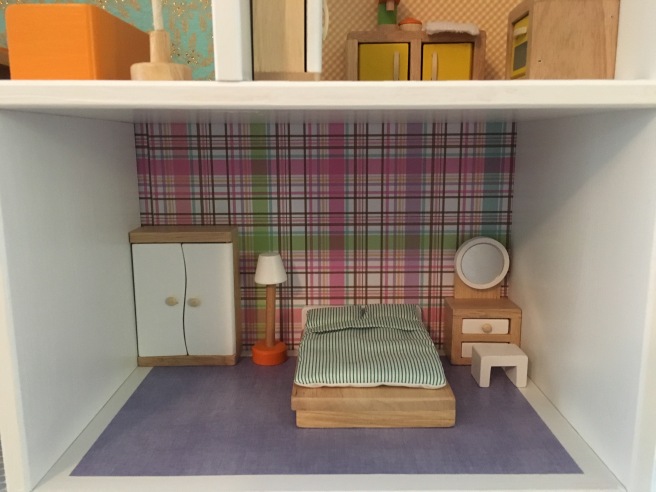
For the floors I tried to choose patterns that I thought would look like a real floor. The kitchen and bathroom look like tile floors and the living room and bedroom look like rugs.
For the walls I chose to just decoupage the back wall leaving the sides of the walls white. I felt this gave the house a cleaner look. I tried to find wall colors that would look good together and complement the furniture I had chosen, again choosing patterns that would be the right scale for the house and dolls. In some cases I had to splice together two sheets of scrapbook paper, which was easier than I thought it would be. I laid out all of the papers with the furniture to make sure they would look good together.
The bedroom.
I love how the house turned out, but if I had to do it again I would choose a different paper for the living room wall. The paper I used is wrapping paper and was hard to work with and warped. As I mentioned previously I also think the print is too big and doesn’t look quite right.
The bathroom.
This was such a fun project and I can’t wait for my daughter to play with it!
Here is a trick our family uses to make diaper changes easier when we are away from home. We create diaper packs that include a diaper, a pee pad (these are designed for pets but are perfect for using as a surface to change baby on), and wipes in a plastic bag. Everything is neatly contained in a poop bag (also designed for pets). When it’s time for a diaper change everything is easy to get to, and everything can be put in the poop bag and thrown away after the diaper change is done. These are so nice for quick trips out, and for those really messy diaper changes.
The heritage brands series on this blog resulted from my years-long search for beautiful stuff that would last. When you walk into most stores these days, much of what you find is uninspiring and cheaply made. A lot of it is plastic and made to last just a few years at most, and much of this is not only ugly but also a disaster in the making for our environment. Further, much of this is also made in places where there are questionable standards for labor and construction.
The heritage brands in this series are brands that still make at least some of their goods in their home country. These companies have generally been around for a long time- some longer than others. Most important, they make things that are both useful and beautiful, things that you will get many years of use out of and be able to pass on to the next generation.
There is a Japanese concept of wabi- sabi which describes the beauty of things that are simple and well maintained but also well-worn. The things I discuss in this series have this quality. A le creuset Dutch oven may acquire a few dings and scratches over the years, but will still function well and may be even more beautiful for its years of service.
Most of these brands are easily found online, a world in itself that changes from day-to-day, so I leave it to the reader to use search engines to find where to buy the things in this book. This book is meant to serve as a guide to help you find things that will last a lifetime or longer.
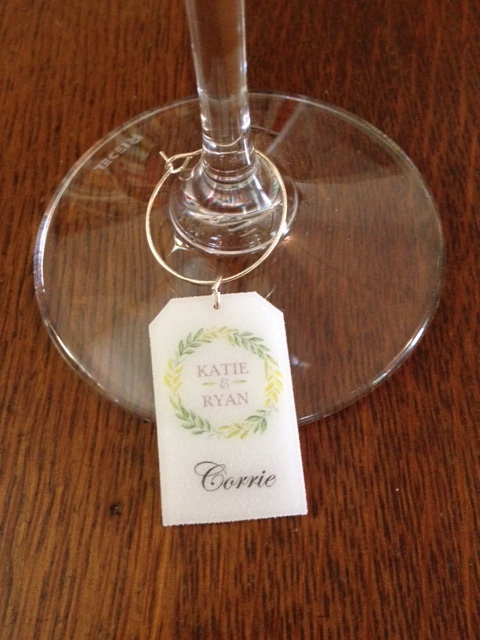
When my sister got married I was looking for an inexpensive but classy way to mark guest’s wine glasses. I came up with the following design using printable shrink film paper.
First, I scanned in the part of their wedding invitation that I wanted to include on the tags. Then I created a PowerPoint file with some test tags with different fonts and image sizes to see what I liked best. The dimensions I ended up using were: tag size 2″ x 4″, image size 1.5″ x 1.5″, font: 40 point Edwardian Script.
Once I had selected the right parameters for the tag I created a template with 10 tags per sheet and then used the template to make the final tags. I entered each guest’s name on a tag and printed them out, then used scissors to cut out each tag, and cut the corners off the tops of the tag. I used a hole punch to punch a hole in the top of the tag, then baked them for a few minutes, and Voila! Wine charms!
I used two pairs of needlenose pliers to attach a jump ring thru the hole and then put a wine charm ring through the jump ring to attach the tag to the glass.
These were relatively easy to make and were a hit at the wedding. They were a fun little keepsake for guests and they made it easy for people to keep track of their glass.


